The path · 4 Expert
Reading the graph of an S-H-O image made with a colour camera
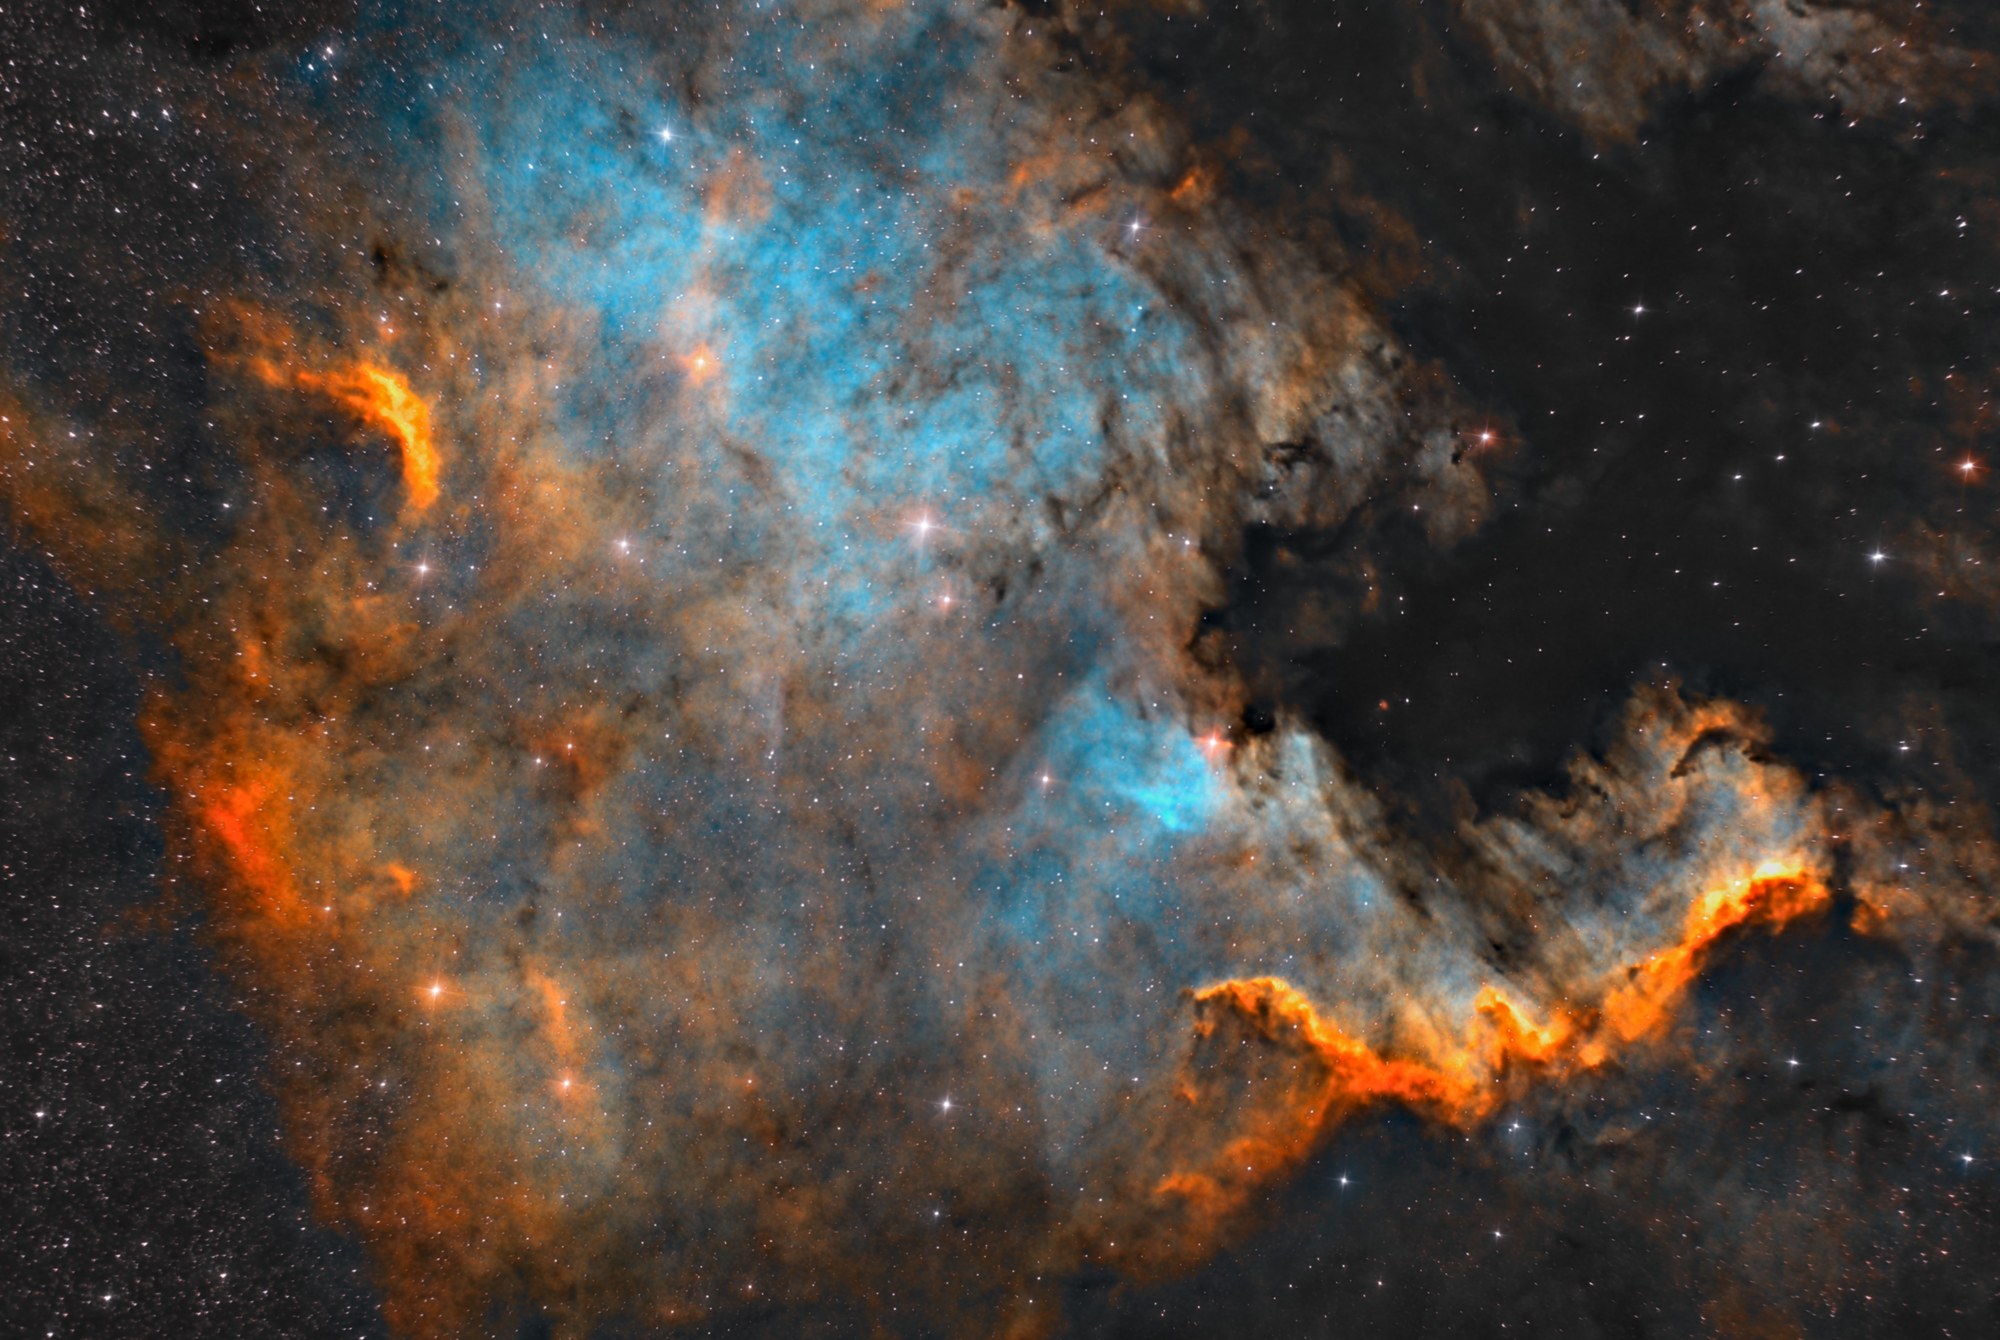
A guided tour of the Graph page of a finished project: NGC 7000 in S-H-O, shot with a colour camera behind two dual-band filters. You see how the three sessions, the four workflows, Align on, the S-H-O combination and the source of the stars fit together, then how to start the same graph from a template.
| Duration | About 10 min: a 2 min 49 s video and the text, with no computing; recorded on a processor alone, without a graphics card |
|---|---|
| Requirements |
|
| Data set | NGC 7000 (North America Nebula) · Sony A7S, 300 s at ISO 2000 · two dual-band filters (O III / H-alpha, O III / S II) and a night without filter · 72 lights (6 h), master bias, dark and flats, Thomas. Frames shown with their author’s agreement; they are not offered for download |
1Open the project
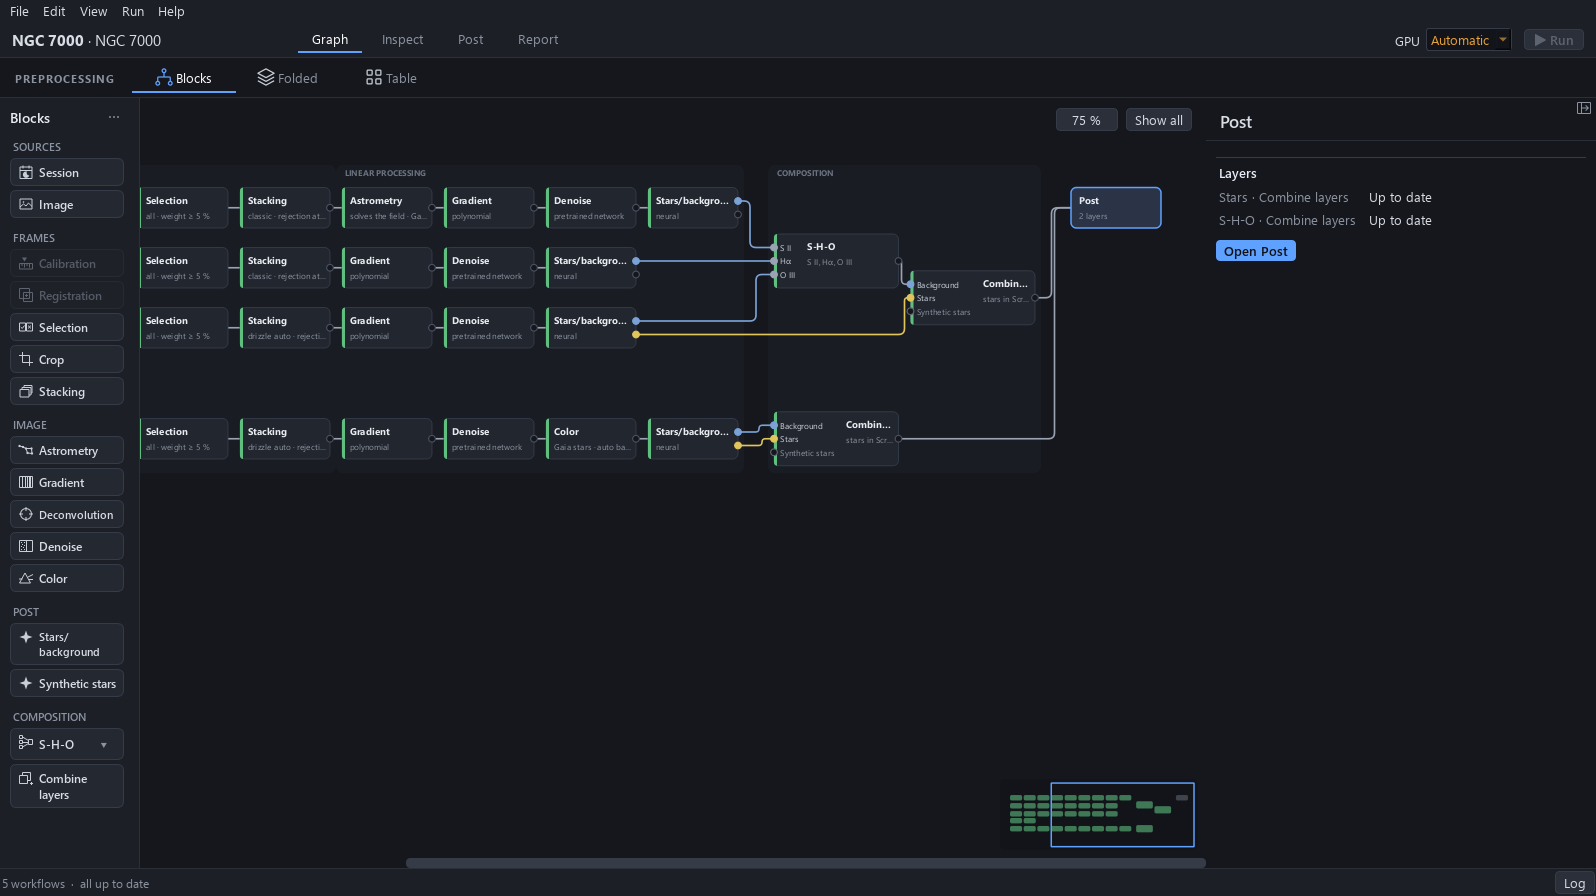
The tour starts from a finished project, opened from the Home screen with Open project…. It opens on its Graph page with every block up to date: the status bar reads all up to date and the Run button has nothing to run.
Why. A tour only reads. Nothing is computed and no setting is changed, so you can look at how the project is built without waiting for a run.
2See the whole graph
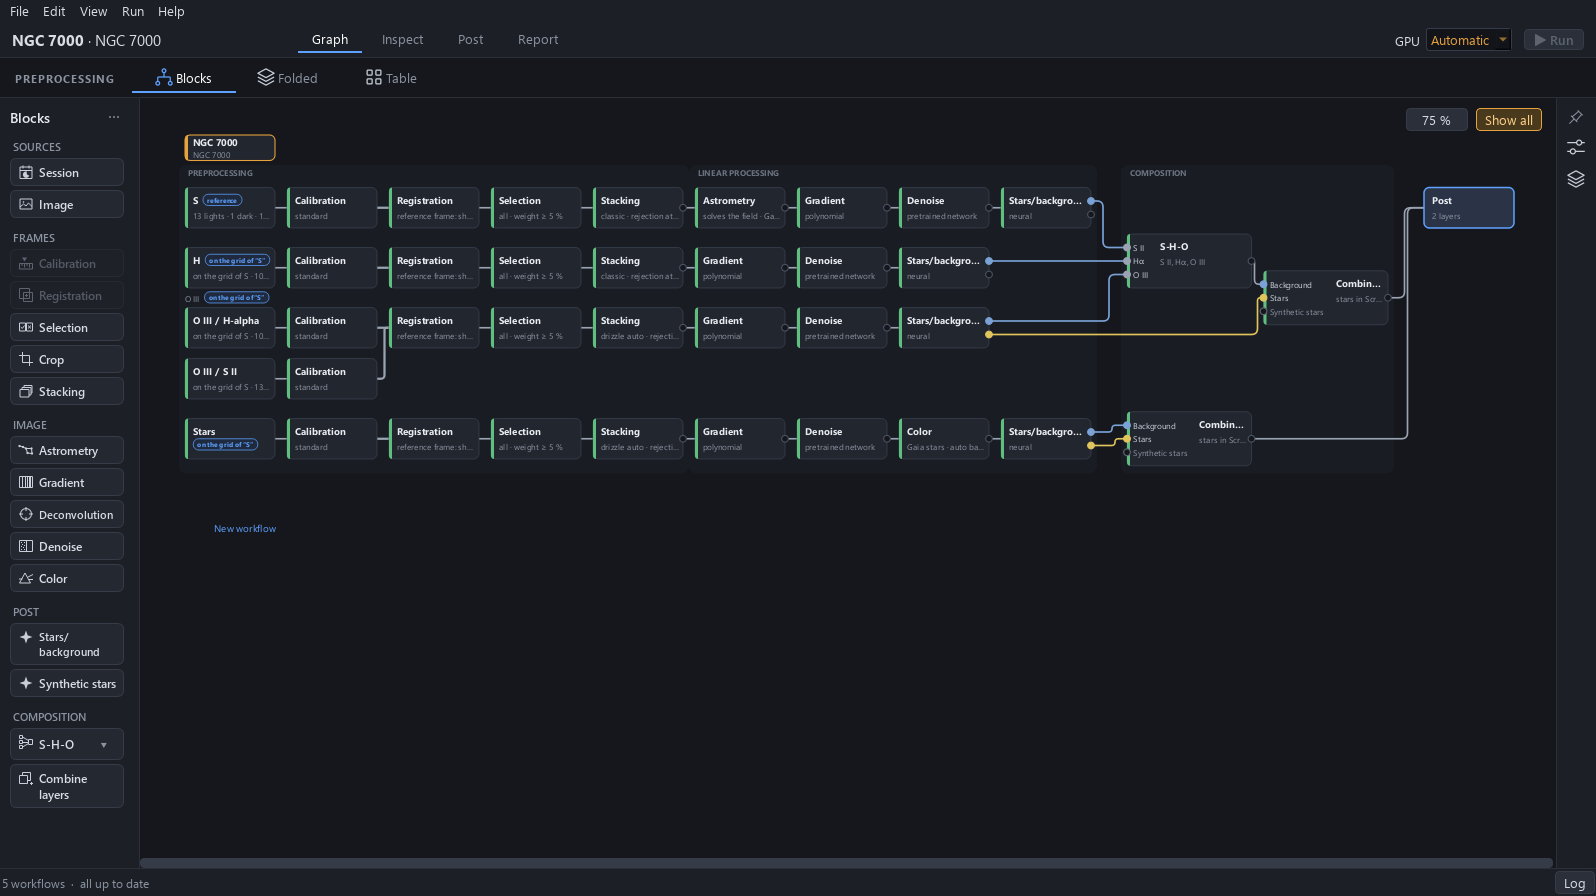
Click Show all, then fold the side panel with the button at the top of its right edge. The whole graph fits on the screen: four rows, one per workflow (S, H, O III and Stars), read from left to right, then the S-H-O combination, two Combine layers blocks and Post.
Why. A graph this wide hides its structure at the usual zoom. Fitting it first shows where each row goes before any block is read.
3Three sessions, one per filter
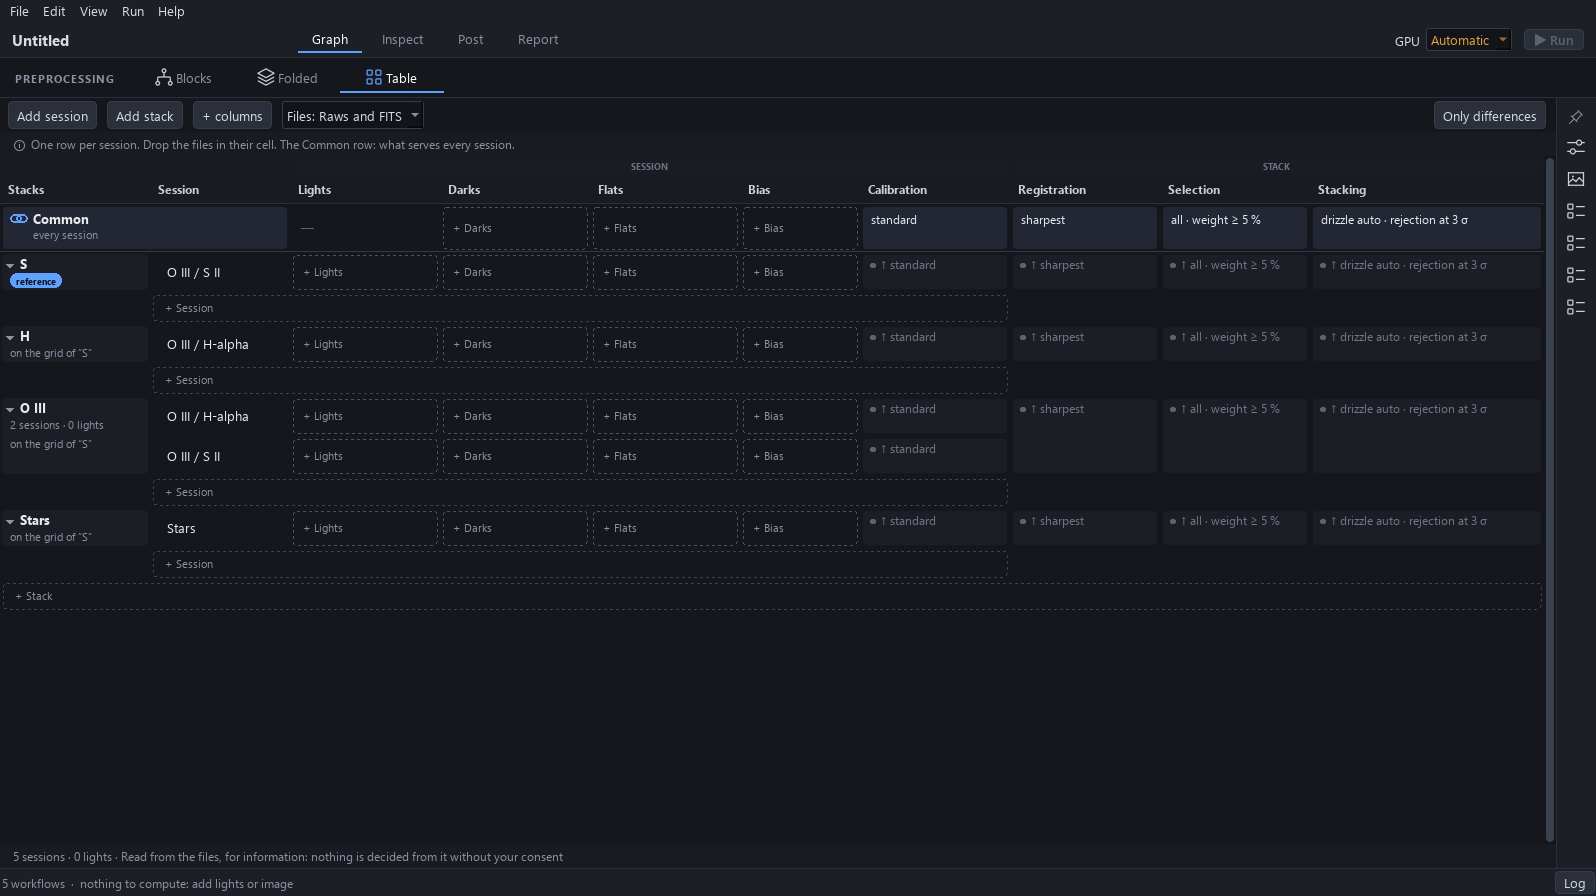
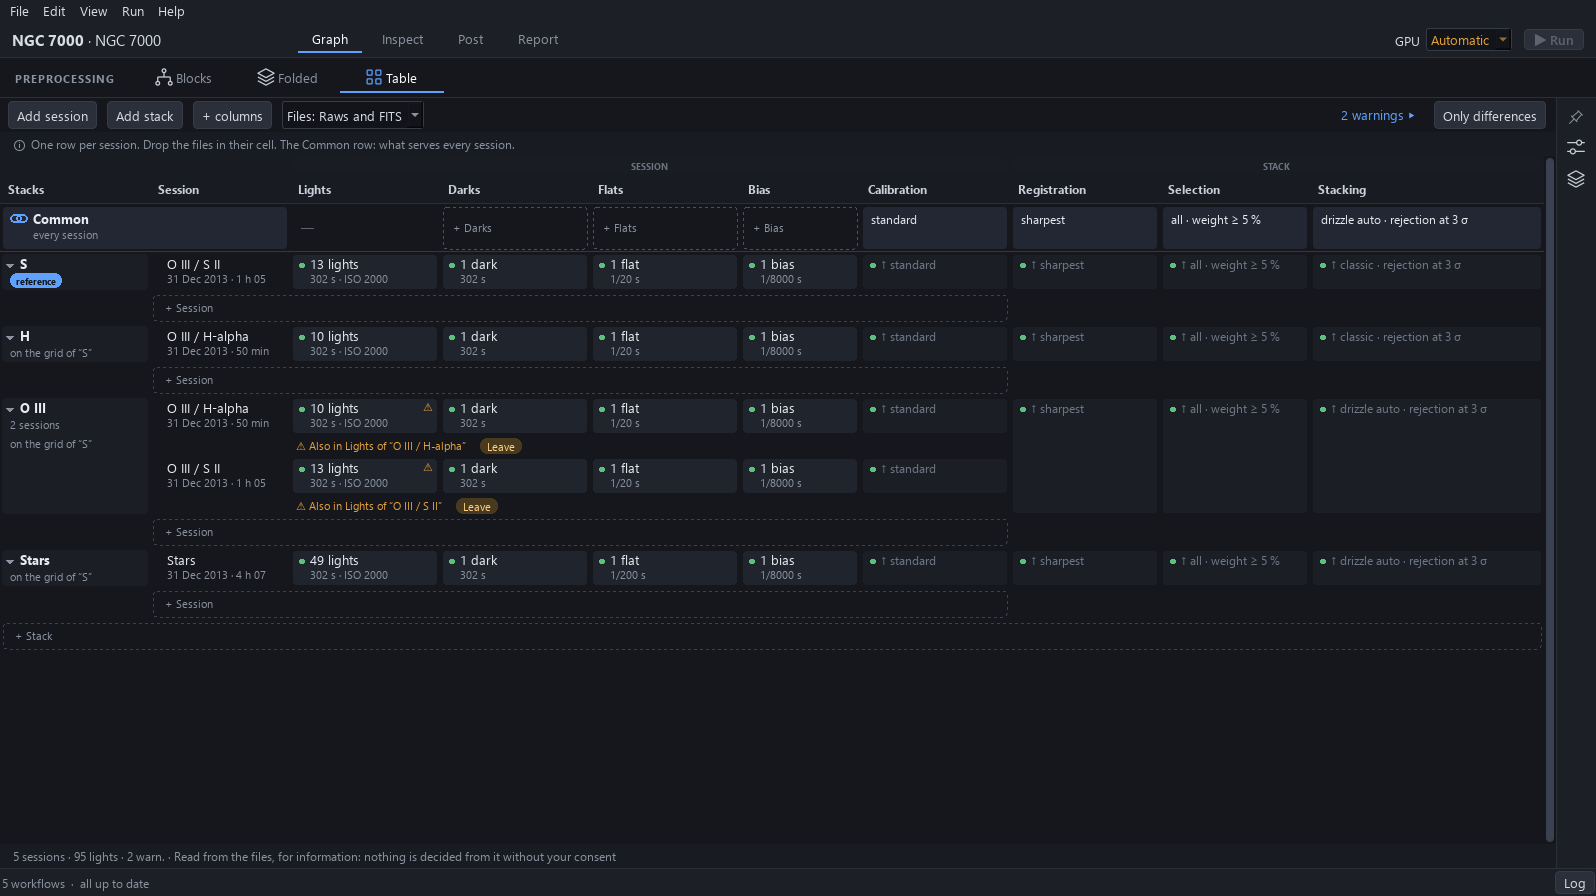
Open the Table view, which has one row per session. There are three: O III / H-alpha (10 lights), O III / S II (13 lights) and Stars (49 lights, the night without a filter). Each has its own flat; the darks and the bias are one master shared by all three.
Why. A flat belongs to a filter: a dust shadow or the vignetting is not the same behind each filter, so a flat made with one filter would correct another one badly. The dark and the bias do not depend on the filter, so one master serves every session.
To avoid. The Table shows the date written by the camera, 31 Dec 2013, because its clock was wrong: the real nights, 17 to 19 June 2025, are in the file names. It also lists two warnings, “Also in Lights of …”: the O III stack uses the lights of the two filters on purpose, so there is nothing to fix.
4Read a session
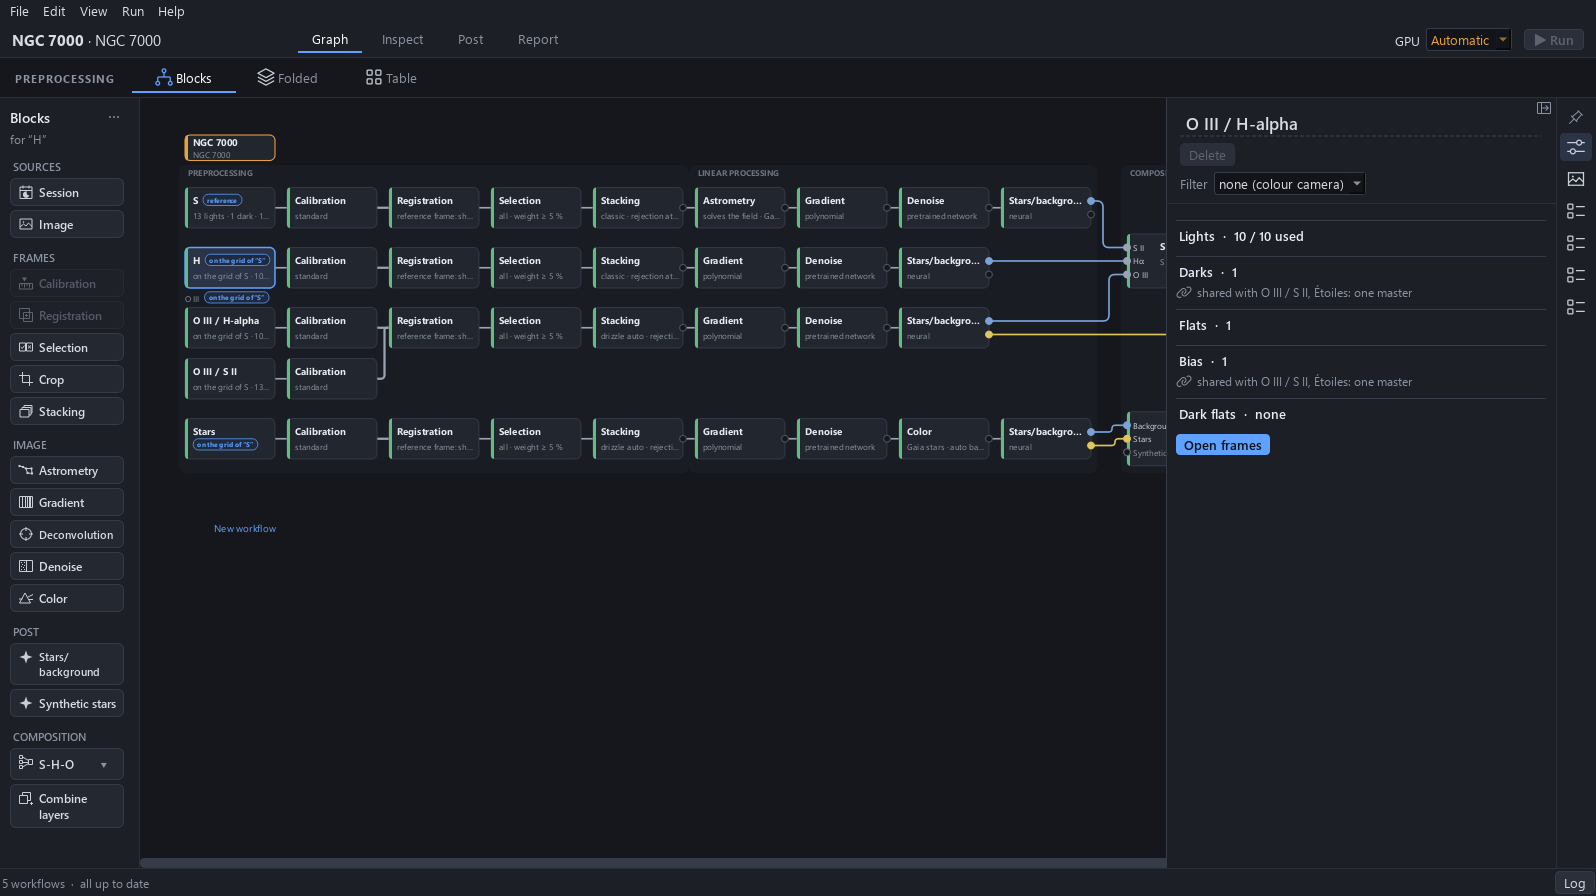
Back in Blocks, select a session card and open Block settings. The panel of O III / H-alpha gives its 10 lights used out of 10, its filter (none (colour camera): the dual-band filter sits in front of a colour sensor), its single flat, and a note on the darks and the bias: shared with the other sessions, one master.
Why. This is where a session’s inputs are checked: that the flat is its own and that the shared masters are really shared.
5One workflow per channel
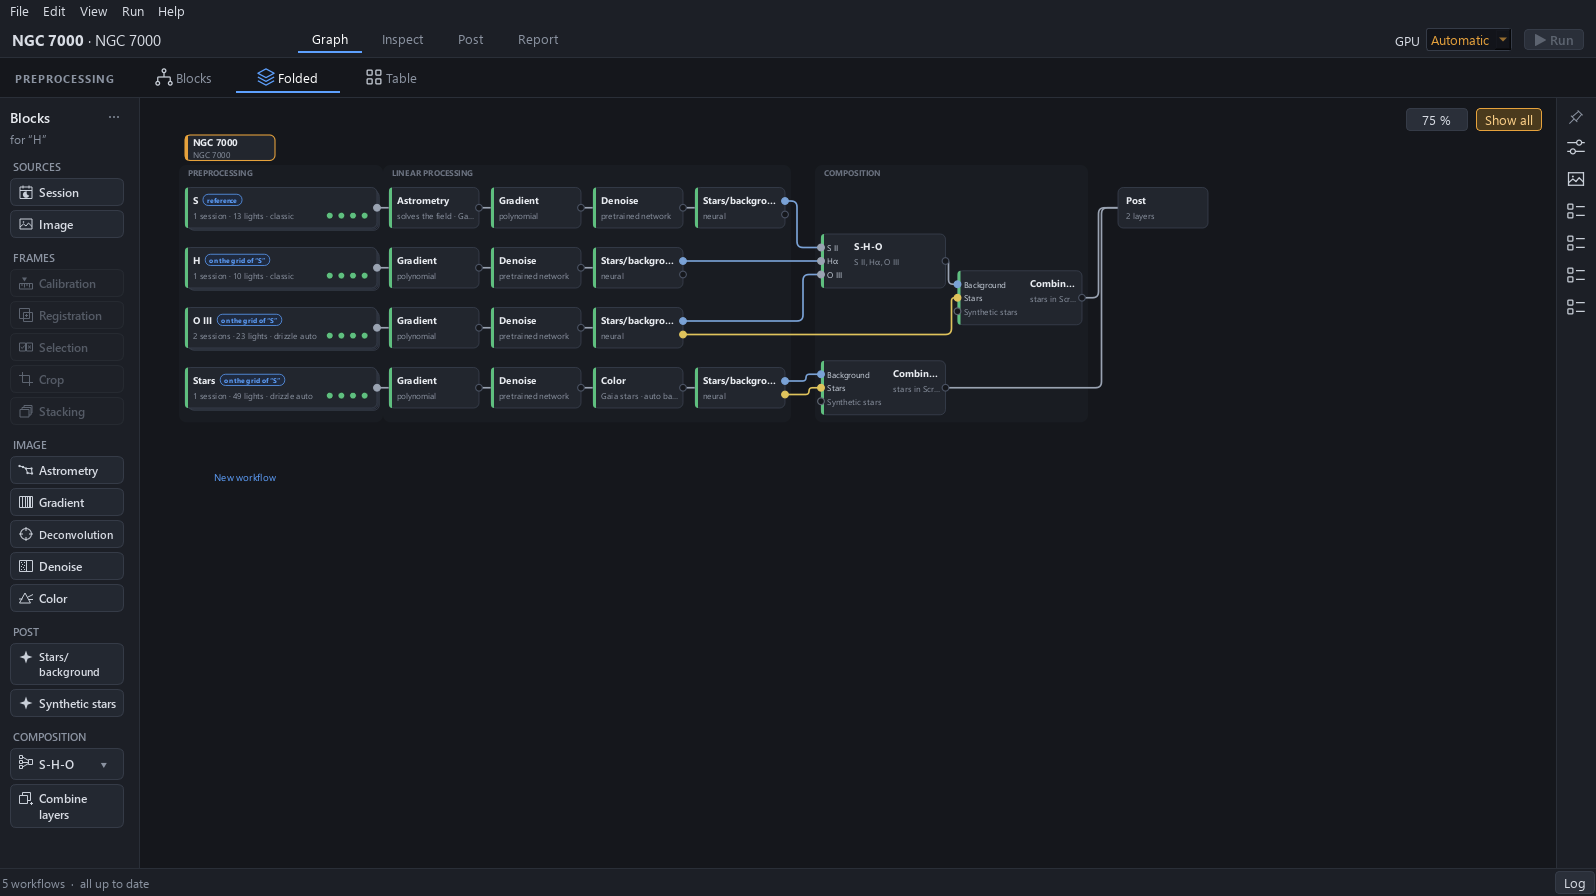
Click Folded: one card per workflow. S stacks the 13 lights of O III / S II, H the 10 of O III / H-alpha, O III the 23 lights of both sessions together, and Stars the 49 lights of the night without a filter. The name of each workflow is the channel it makes.
Why. A dual-band filter lets two narrow lines through at once, and a colour sensor records them on pixels of different colours: H-alpha and S II are red lines and fall on the red pixels, O III is green-blue and falls on the green and blue pixels. Since both filters pass O III, the two sessions add up in one O III stack: 23 lights instead of 10 or 13.
6S is the reference
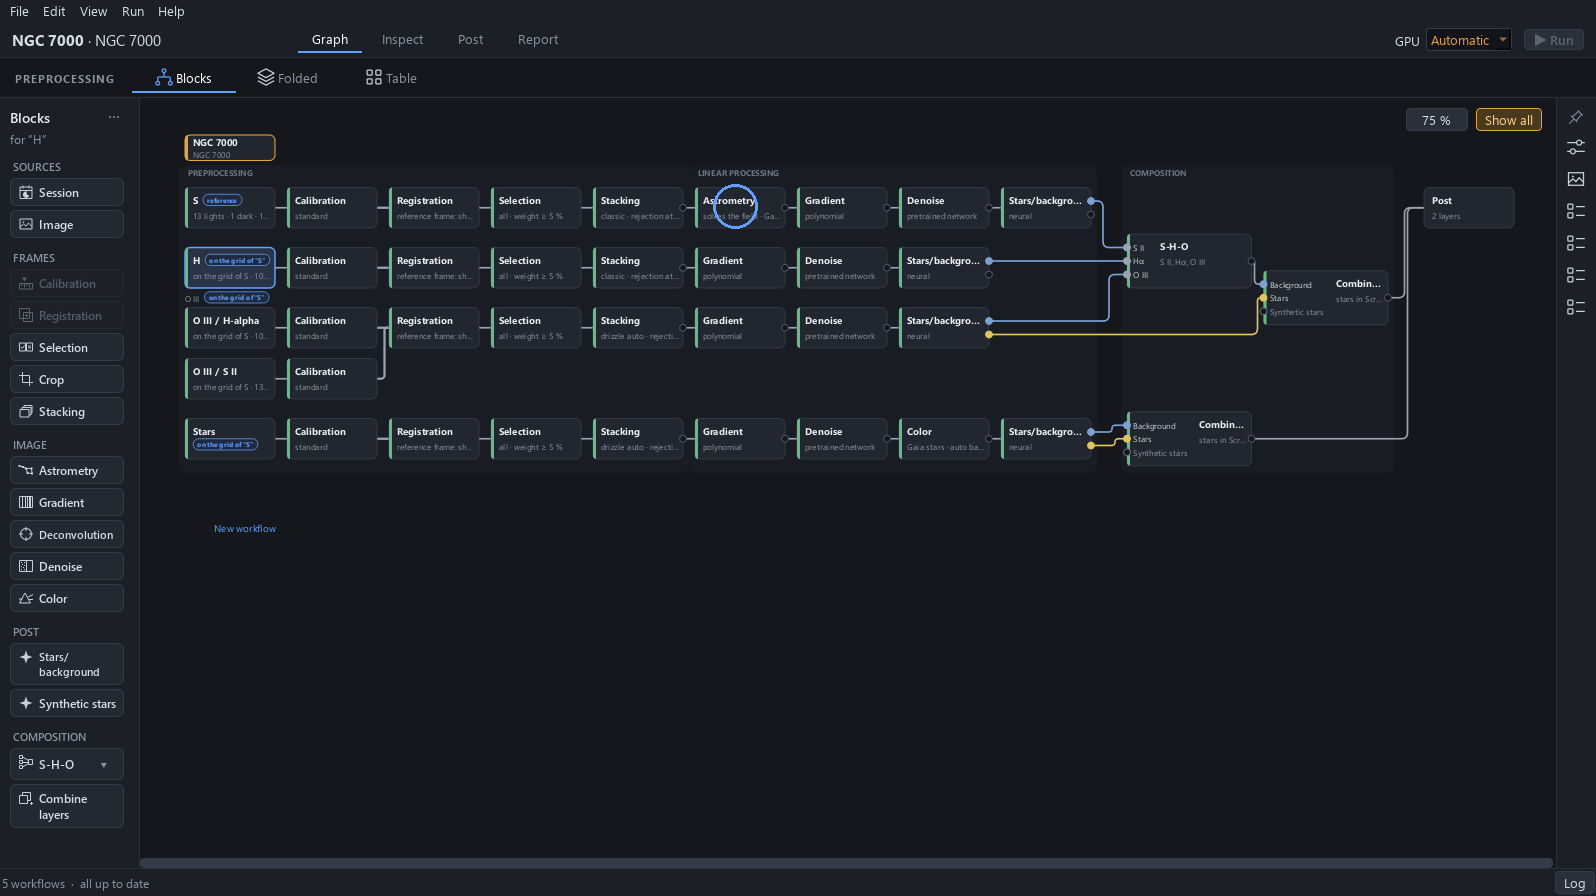
Back in Blocks, only the S row has an Astrometry block, which solves the field. The S card carries the tag reference; the cards of H, O III and Stars carry the tag on the grid of “S”.
Why. Four stacks made separately do not fall on the same pixels. One of them, S, is solved and serves as the grid; the three others are brought onto it by Align on, so only S needs its own Astrometry block.
7Align on
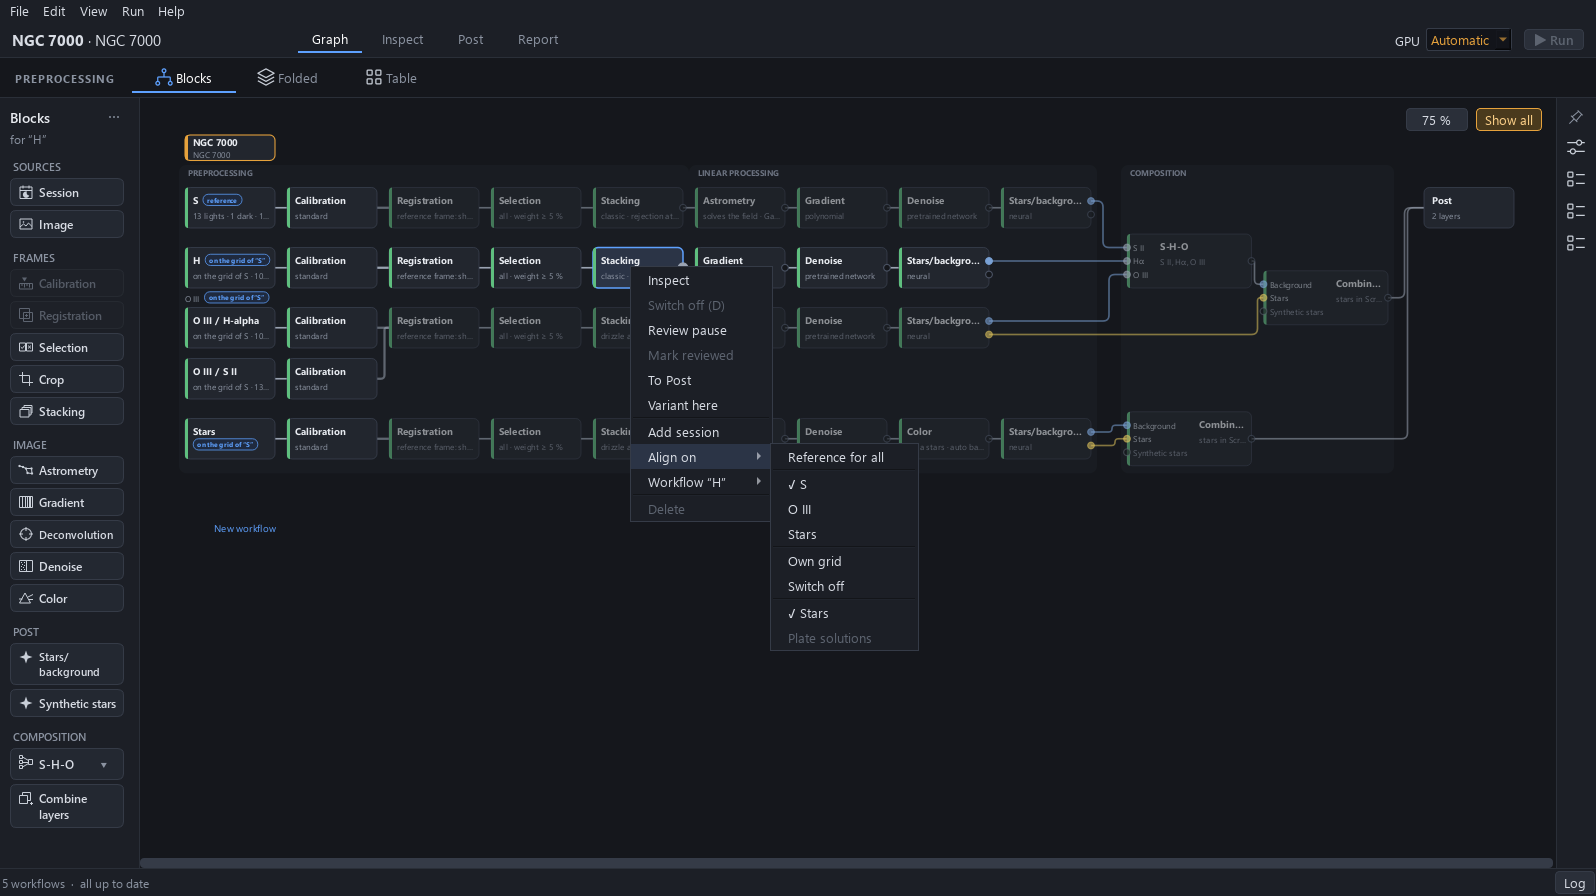
Right-click the Stacking block of H and open Align on. The reference is S (checked) and the method is Stars (checked; Plate solutions is greyed). Press Escape to close the menu: nothing is changed.
Why. Before they are combined, the stacks must lie on the same pixels. Align on brings the stack onto the grid of S through the stars, right after Stacking, while the stars are there: it takes S’s size and framing, and what overflows is cut.
8The S-H-O combination
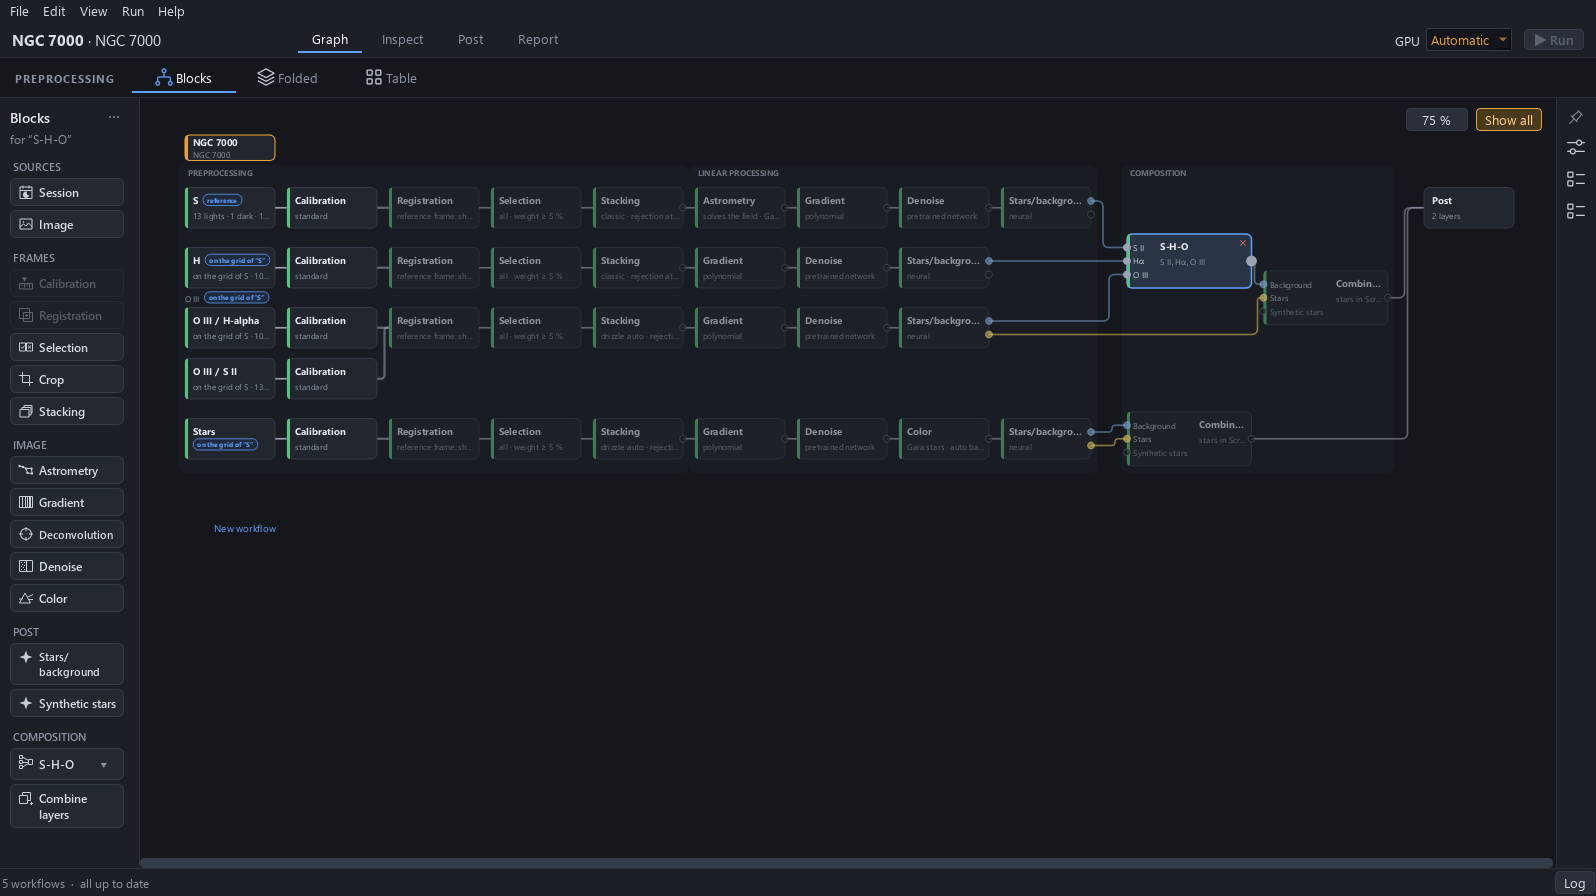
Select the S-H-O block: its wires light up and the rest of the graph dims. It is a combination, not a stack: its three inputs come from the Stars/background block at the end of S, of H and of O III, and it reads their starless image.
Why. The stars of each stack differ in size and colour from one filter to the other, since each is seen through different lines. Combining them would give coloured stars with fringes, so the stars are taken off first and the combination works on the nebula alone.
9Which pixels feed which colour
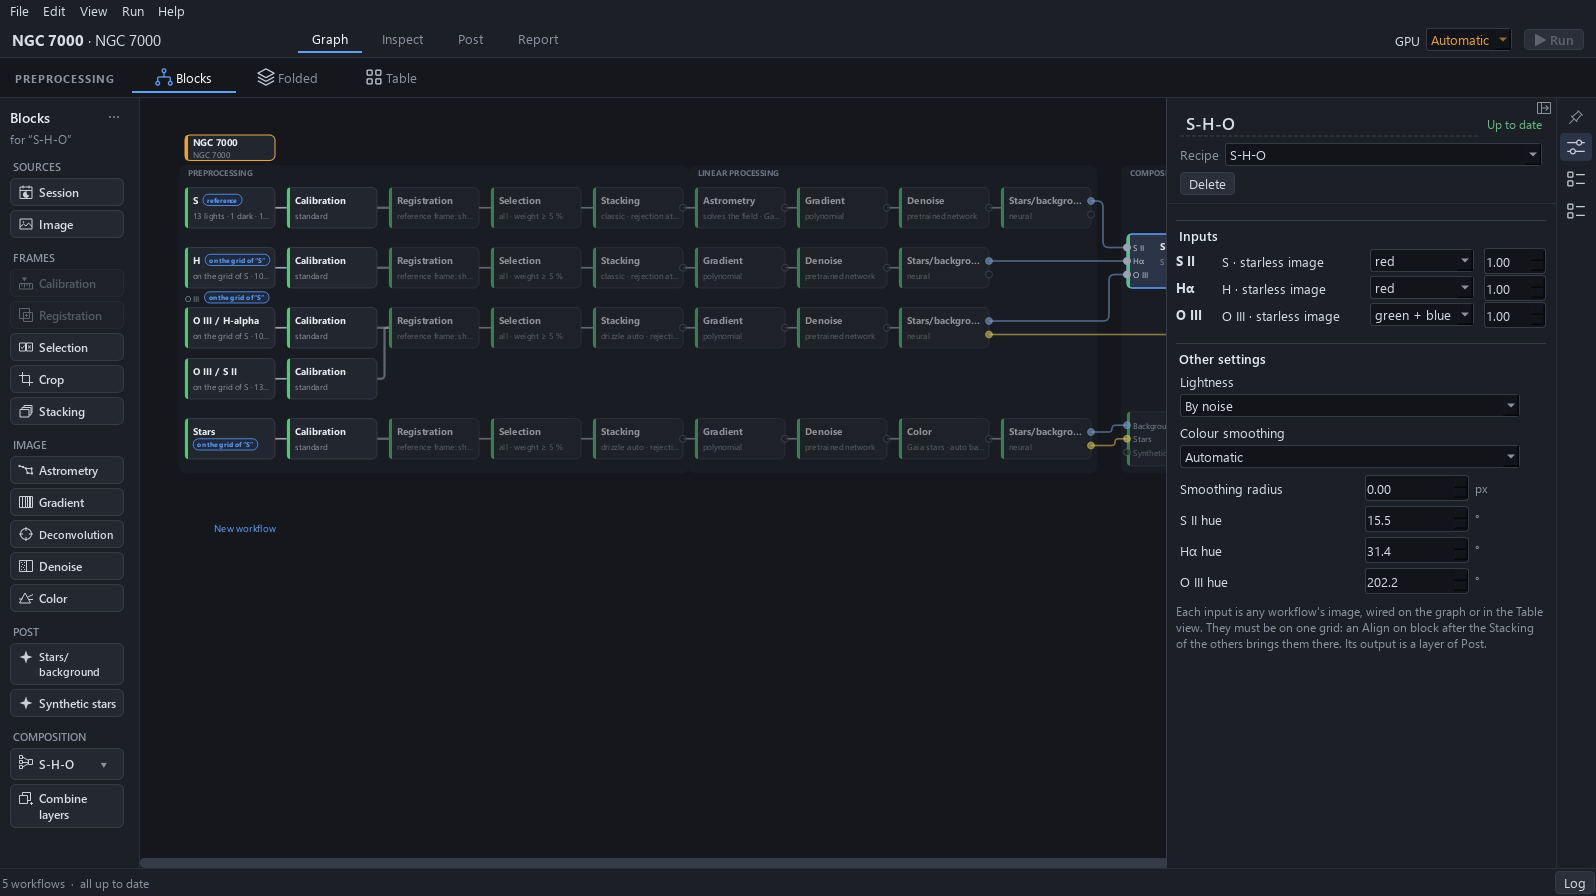
Open Block settings. Under Inputs, S II and Hα each take the red pixels of their starless image, and O III takes green + blue. The recipe gives each filter a hue: S II 15.5°, Hα 31.4° (warm) and O III 202.2° (blue-cyan).
Why. This is the one setting that says which pixels each channel uses: behind a dual-band filter the line is told by the pixel colour, red for H-alpha and S II, green and blue for O III. The hues then give the palette its look: gold and orange for the red lines, blue for O III.
To avoid. The values shown are the recipe’s own; this tour does not change them.
10Where the stars come from
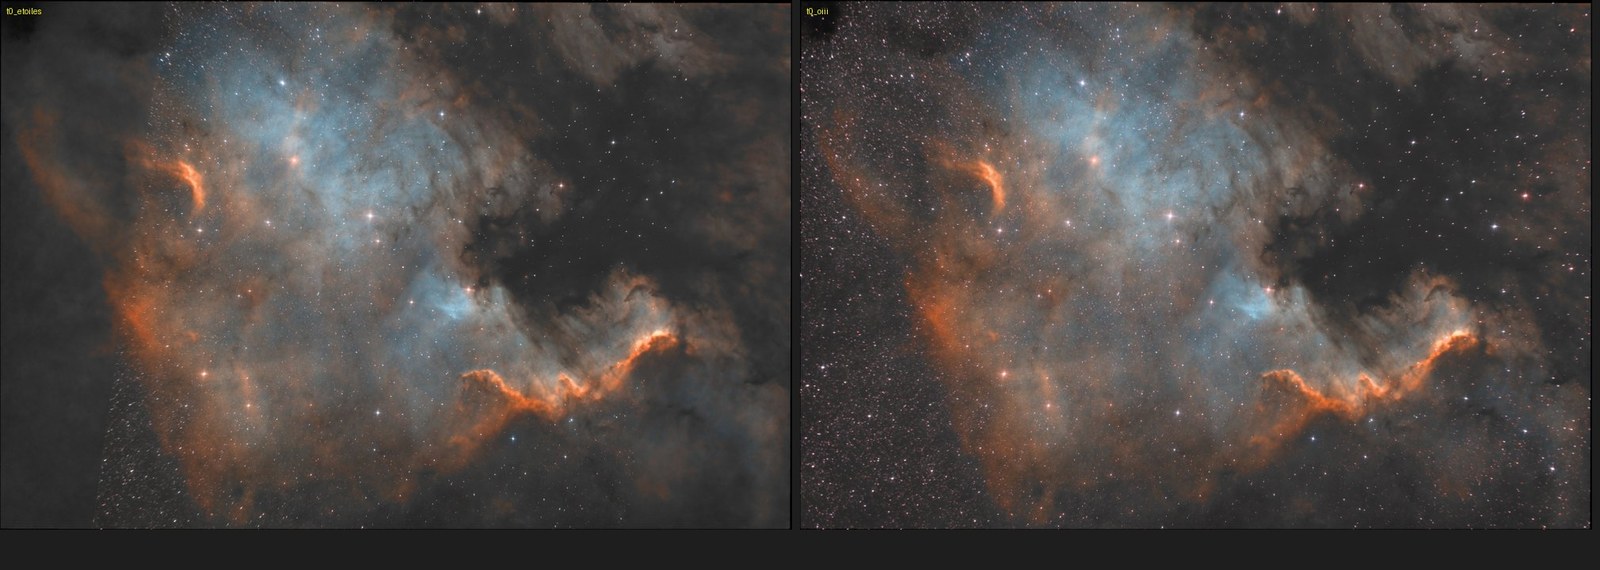
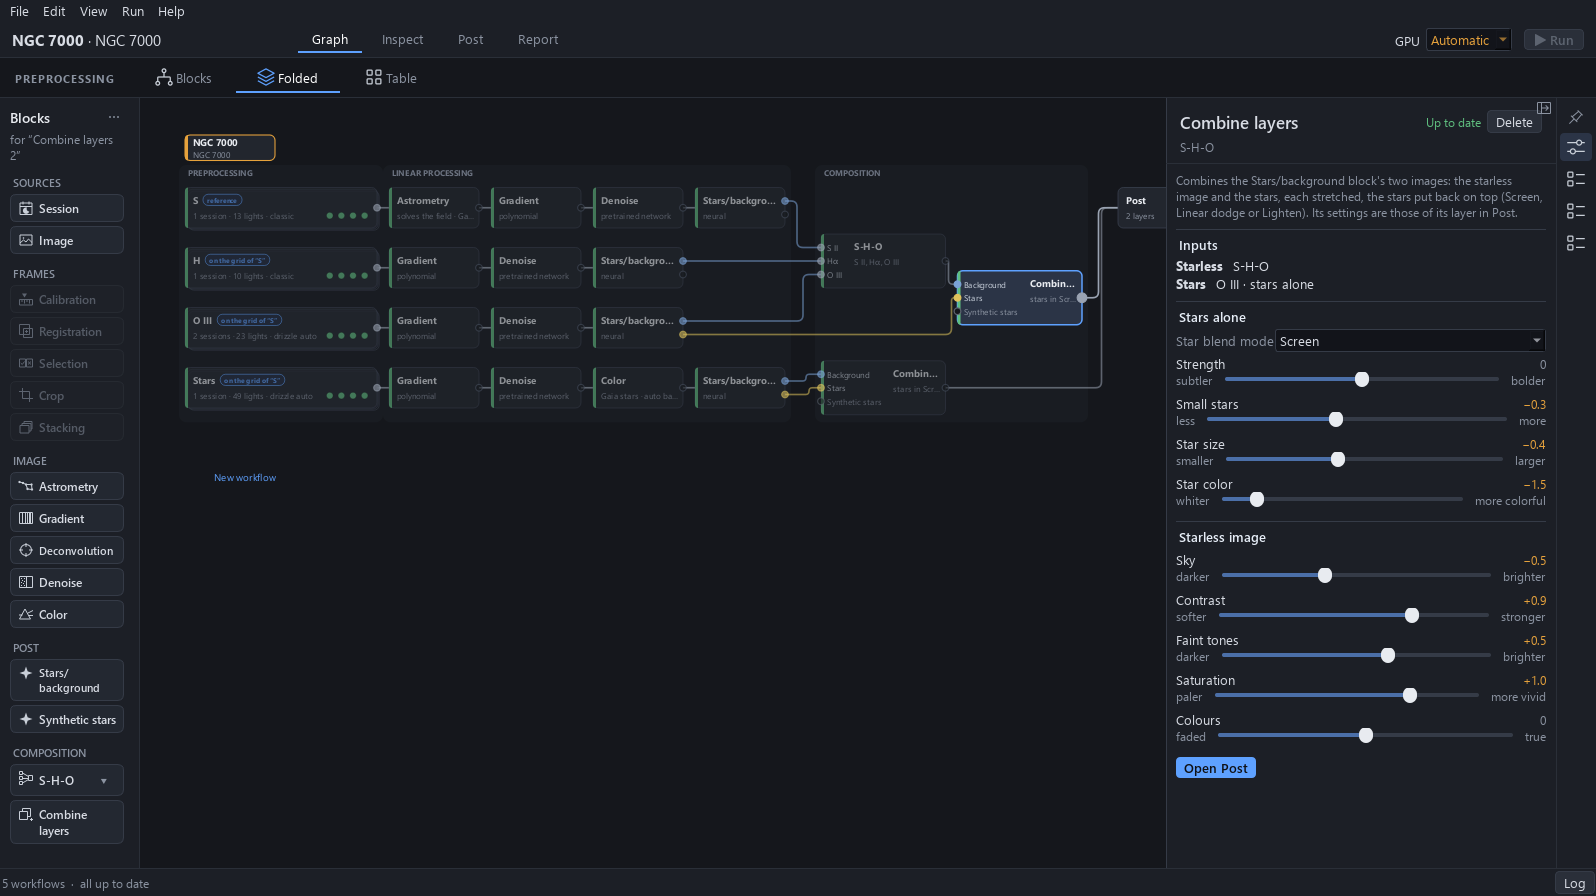
Close the panel, select the Combine layers block after S-H-O and open Block settings. Its inputs read: Starless S-H-O, Stars O III · stars alone. The stars put back on the S-H-O image are those of the O III workflow, not those of the Stars workflow.
Why. The night without a filter was shot turned by 82° from the others, so its field does not cover the S-H-O field: with its stars, a whole wedge on the left has none and a seam appears. The O III stars cover exactly the same field and are the sharpest of the narrow-band ones. Their colour is not real, since they are seen through O III: the next tutorial whitens them.
11The Stars workflow stays
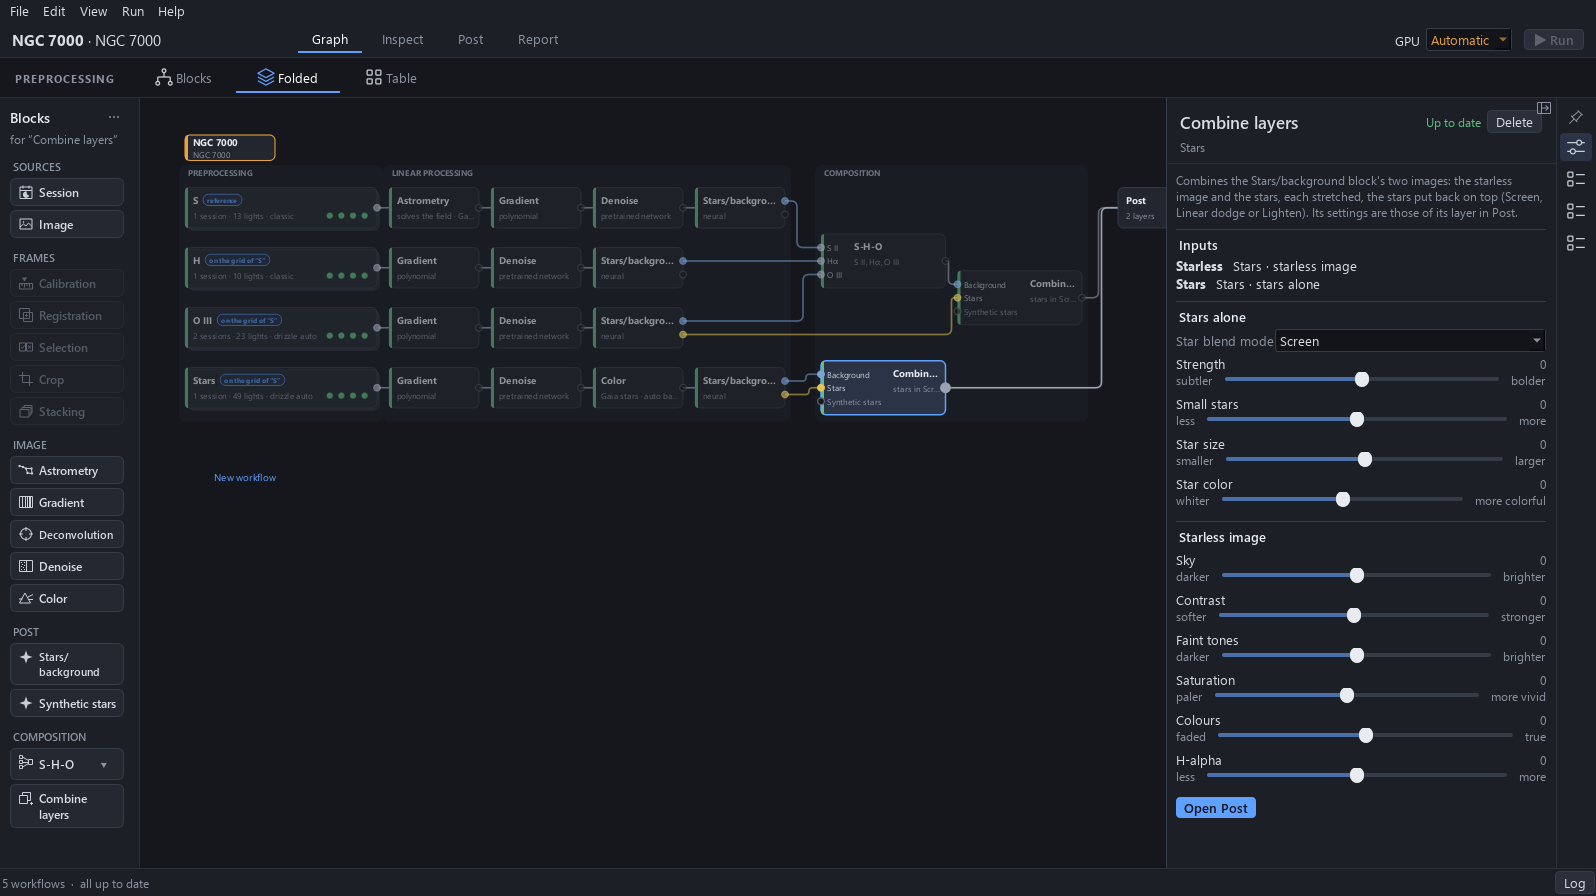
Select the lower Combine layers block and open Block settings. It belongs to the Stars workflow: its inputs read Starless Stars · starless image and Stars Stars · stars alone, both from the night without a filter. Its layer is hidden in Post.
Why. With a night without a filter taken at the same angle as the others, this would be the right source of stars. Here it stays in the graph, computed, but its layer is hidden in Post.
12End on Post
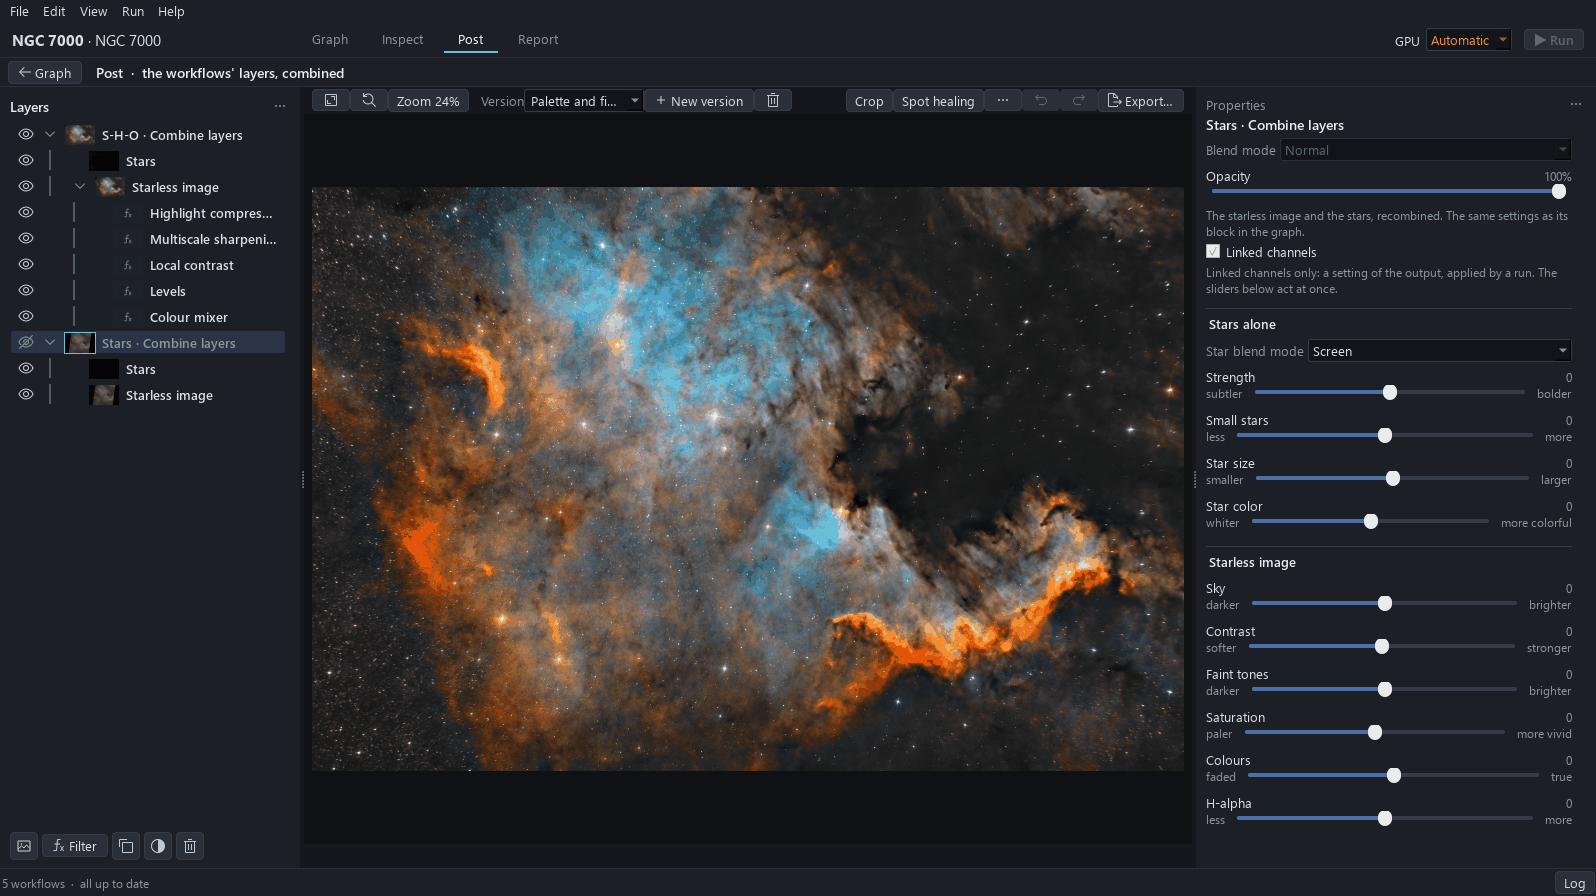
Click Post. The active version is Palette and finish: on the starless image it stacks Colour mixer, Levels, Local contrast, Multiscale sharpening and Highlight compression, under the stars of the S-H-O Combine layers. The layer of the Stars workflow is hidden. Nothing is touched here.
Why. Every wire of the graph ends in Post, which turns the combined stacks into the finished image. The next two tutorials do these Post gestures one by one.
13How to get this graph for your own data
Open the File menu, click New project, then From template, and in the Color tab choose Dual-band x2: “A colour camera with two dual-band filters (O III/H-alpha and O III/S II) and a session for the stars.” The graph arrives with the four stacks, the sessions already named per filter, and H, O III and Stars already on the grid of S (see the Table). Only the frames are missing: add the lights of each session with the flat of its filter, then the darks and the bias, type the target and run.
Why. A template saves building the four rows, the sessions’ names and Align on by hand.
To avoid. The template takes the stars of its Combine layers block from the Stars workflow. In this project they come from O III, because the night without a filter does not cover the field; that is a choice made on this project, and the template does not make it for you.